To separate the data of one Excel cell into separate columns, you can use the 'Convert Text to Columns Wizard'.
Using this example, I'll show you how to separate a list of full names into last and first names.
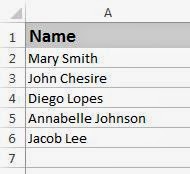
First, select all the data you want to separate, then on the Data tab of the ribbon, click Text to Columns

A wizard window will appear with some prompts that will guide you through this process. The first of which is deciding if your data is Delimited or Fixed width. Basically, Excel needs to know where the data should be split... should it chop the data after a fixed number of characters (Fixed width) or when it finds a specific character (Delimited). In the case of names and surnames, you cannot predict how long a name will be, and therefore it makes sense to use Delimited.

Click Next

Now you get to indicate what the delimiter is. Check boxes have been created for the most common characters that act as delimiters. In this example a space separates the name from the surname and has been checked as such. If necessary, you can click the Other option and type in the delimiter.
This screenshot shows an example of needing to use a colon (:) as the delimiter.

As soon as the delimiter is specified, you can see a preview of your data below. Click Next and then click Finish to see your newly separated data.
Another example is of data the suits a Fixed width delimiter. This should only be used when you are certain of the number or characters you'd like between each section of data.
Once again, select all your data first, then on the Data tab of the ribbon click Text to Columns. Choose Fixed width as your delimiter and click Next

You now create"break lines" which show where the data is to be separated by following the instructions at the top of the window. Once you've indicated all the break lines click Next.

In the case of this example, I've separated the actual digits of the serial number away from the text "S/N" and actually I don't want the "S/N" heading anyway, so this step gives you the option to dump any columns of data you don't require. Click the column that you don't want to keep (it'll be selected very clearly in black) and then click the option at the top of the window "Do not import column (skip)"

Click Finish to see your data.
That's it. Quite an easy process once you get the hang of it. Now you'll never need to manually edit those spreadsheets when next faced with a scenario like this.
Have a great week!
No comments:
Post a Comment